Support
I'll continue to gather as much useful information as possible here to help you get up and running with your lil-Mule. Follow the image links above or see the frequently asked questions and tips below. Please feel free to contact me if you have questions.
Best,
--Warren
What's included when I buy a lil-mule?
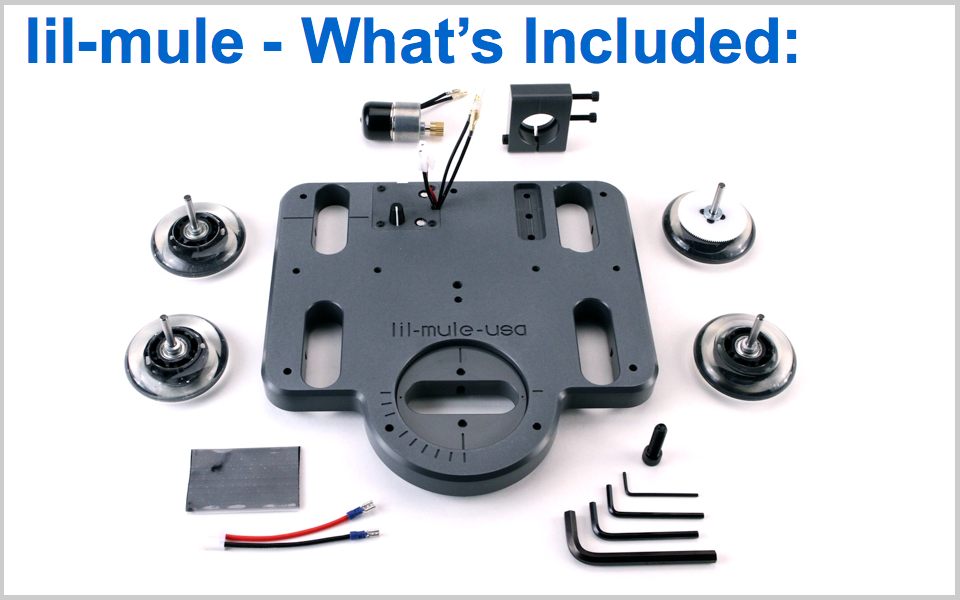
Once your Lil-Mule arrives and you open up the box, you'll find the following items:
• lil-mule time lapse dolly base with controller installed
• 6 rpm motor with removable pinion gear
• Motor mount with 1/4-20 mounting hardware
• 3 elastomer wheels including bearings, spacers, axles, and washers
• 1 geared drive wheel, washers, axle
• "Tamiya" to 12v battery cable and velcro for batteries (not included)
• 4 hex key wrenches and a 3/8-16 bolt for attaching your head of choice
What type of video head can I mount to the lil-mule?
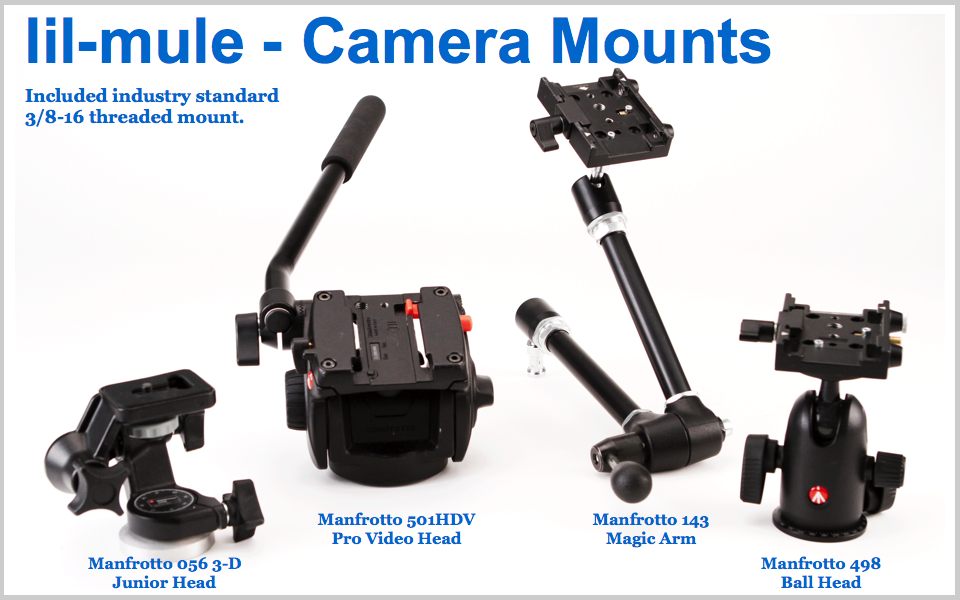
Lil-Mule comes with a 3/8-16 bolt in the center of the dolly. 3/8-16 is the industry standard thread type that most "camera mount types" used for mounting to tripods, monopods, etc. The idea here is that most photographers / videographers will already own a means of attaching their camera to Lil-Mule. Here are the specifics of the different grip in the photo (from left to right):
1) Manfrotto 056 3-D Junior Head
2) Manfrotto 501HDV Pro Video Head
3) Manfrotto 143 Magic Arm (By Far my favorite because of it's flexibility!)
4) Manfrotto 498 Ball Head
Can I mount other things to the lil-mule, like a monitor etc.?
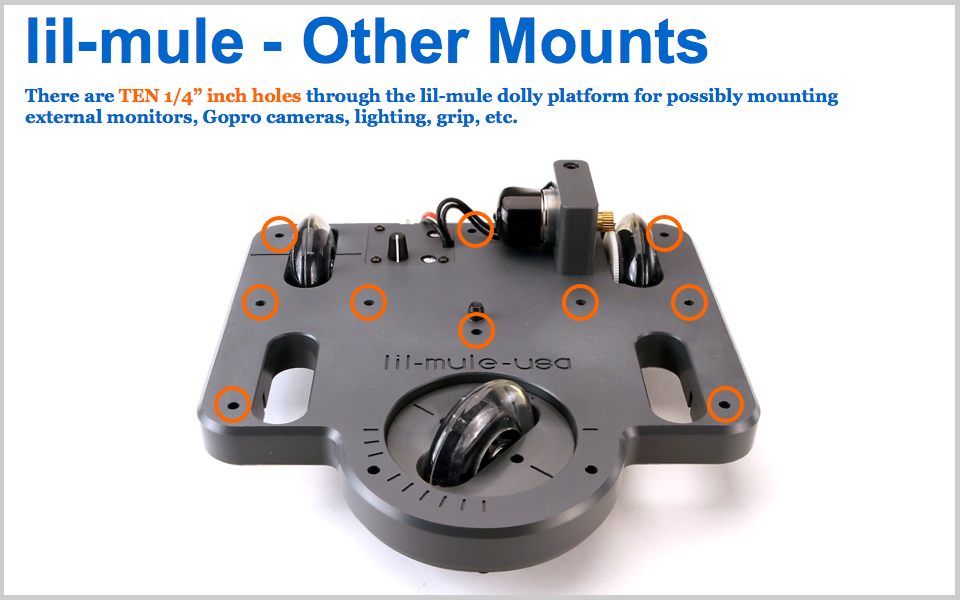
Yes, you can! There are ten 1/4 inch diameter holes scattered around the body. None of them are threaded, but they all go completely through the body of lil-mule so you can pass a 1/4 inch bolt through to mount your grip of choice. I've mounted my field monitor on shoots, mounted an additional go pro camera... Lil-mule's sturdy 1 inch thick body can support as much weight as you can balance on it.
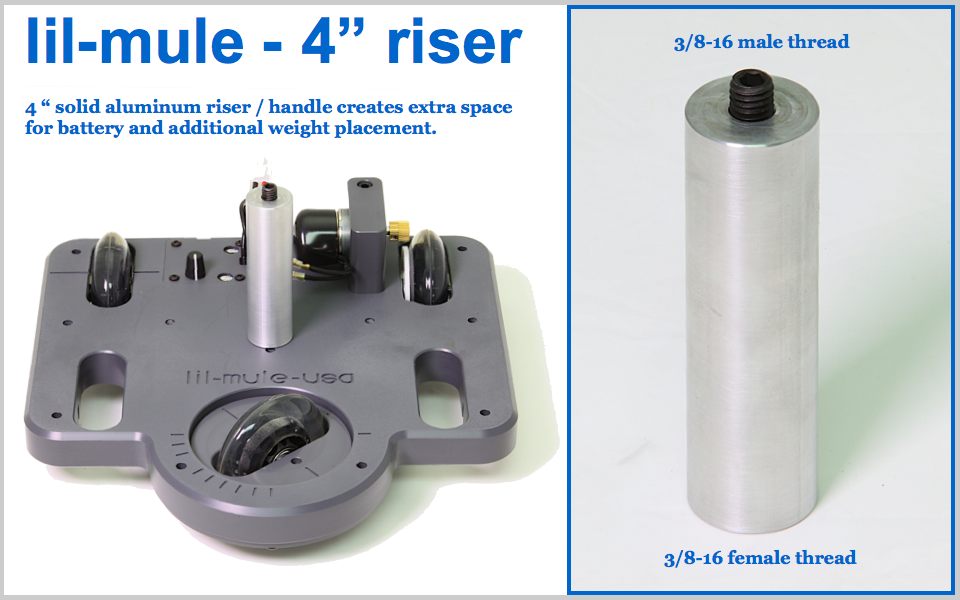
Tip: Maximizing space for batteries and extra weight with 4 inch riser.
Since launching lil-mule on Kickstarter, I came up with a small 4 inch solid Aluminum riser accessory to help maximize the space available on top. Turns out the riser also becomes a pretty nice handle for moving your rig around from shot to shot.
Depending on the type of head being used, and wheel configuration (3 wheel for arcs, 4 wheel for straight), choice of where to have the battery ride on lil-mule's platform can change. If you are planning on using the Manfrotto Magica arm, it's super thin profile when mounted to lil-mule achieves the same goal.
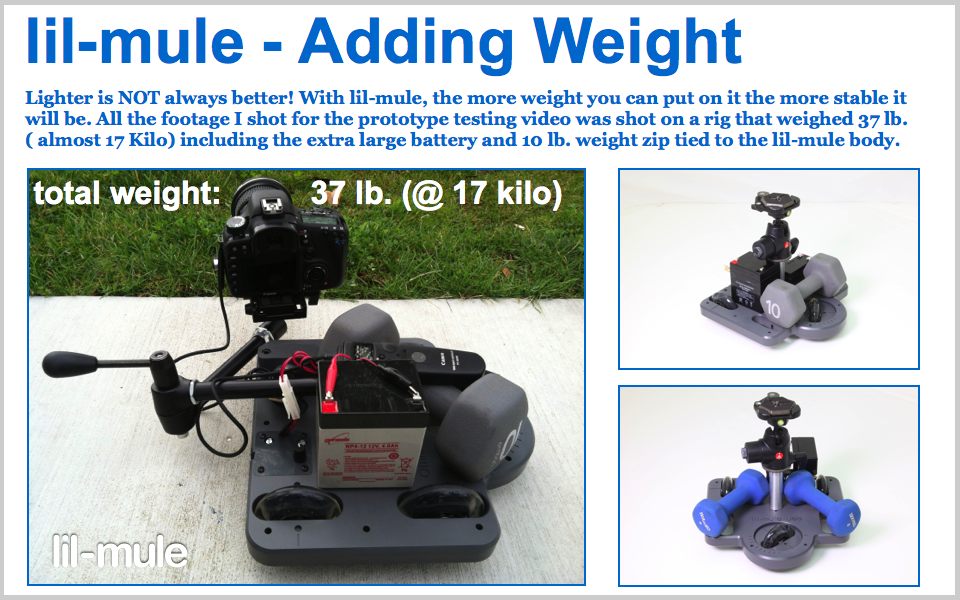
How much does lil-mule weigh and how much weight can it support?
Lil-Mule weighs right at 8 lb ( 3.63 kg) by itself once it is all assembled. Contrary to what many may think, it is actually benefical to have as much weight on lil-mule as possible.
Extra weight (balanced properly) can help lil-mule power through any debris or cracks when trying to shoot a lapse on less than perfect surfaces. As you can see in the image to the left, during the prototype testing I did, the total weight of the rig was 37 lb ( @ 17 kg) by the time my 7D with lens, huge battery, and additional 10 lb weight zip tied to lil-mule.
How do I remove the pinion gear to switch between the motors?
Even if you only purchased the standard dolly kit with the 6 rpm motor included, you also receive an allen key that is used to remove the pinion gear (should you decide to add other motors later...). As you can see in the detailed steps of the photo to the left, simply loosen the set screw on the pinion gear, slip it off and replace on the motor you are switching to.

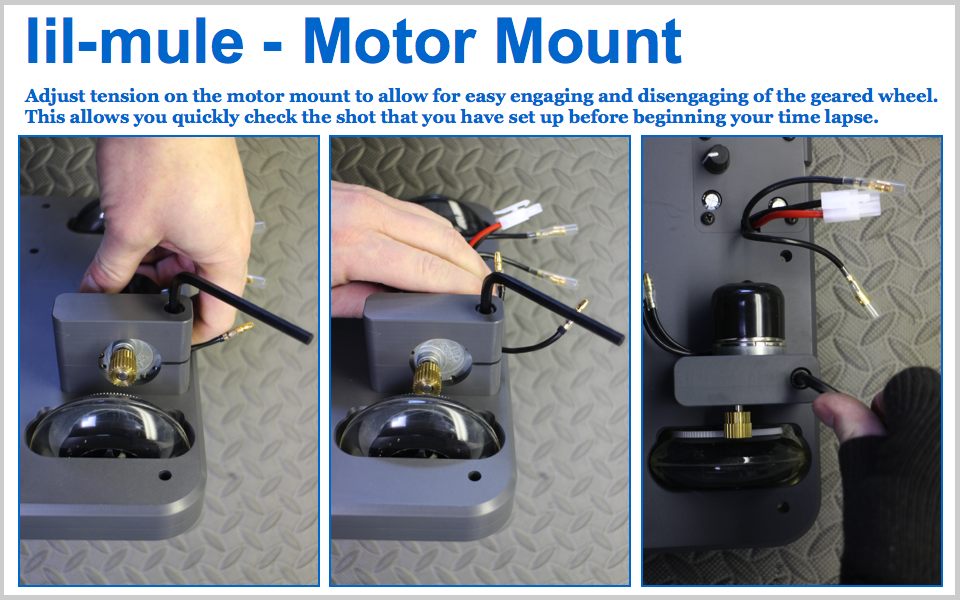
Tip: Adjusting the motor mount tension properly!
Once the motor mount block is mounted to the lil-mule body during assembly (before putting a motor in it), it's key to keep a couple things in mind with regard to tension applied to the motor.
I like to adjust the tension so that I can just barely rotate the motor to engage and disengage the with the geared wheel. Makes for quick set ups.
Second, when engaging the motor to the geared wheel, it is important not to over tighten which can bind the motor and hinder results. The motor will drive the wheel best when adjusted so that the teeth just start to mesh together when rotating the motor into place. then a quick cinch to lock it in place.
How do I know I'm installing the motor connections correctly?
The motor bullet connector and the female bullet connectors coming out of the controller are all black. It doesn't matter which black male connector is connected to which female connector on the controller. Reversing them simple reverses the direction the motor will move based on the input from the controller. Since the controller gives you variable speed in both directions, this redundancy makes reversing of the connectors insignificant.

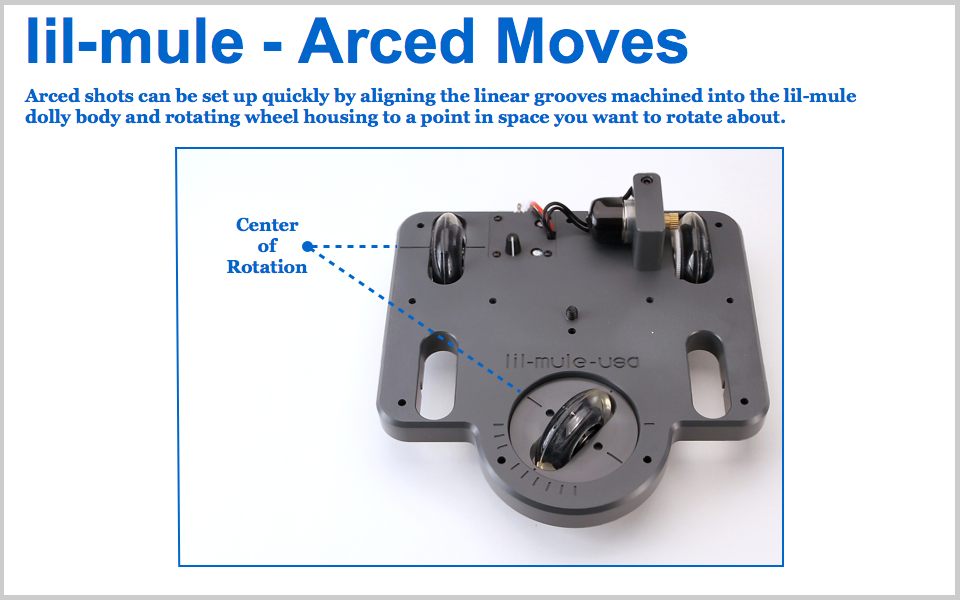
How easy is it to create arced moves? Are there some charts included?
There are no complicated charts or calculators necessary to setup arc moves with lil-mule. During the manufacture of lil-mule, lines were machined into the body and wheel housing to make it quite simple to approximate a center point of rotataion. As you can see in the diagram to the left, simply place the dolly with the rear wheel axle line pointed at your subject (point in space) and then rotate the moving wheel until it's wheel axle line pointing to the same point. Now lil-mule will rotate about that spot.
Can lil-mule do advanced things like move/shoot/move shots at night?
I designed Lil-Mule to be as simple and affordable as possible. The included motor controller is simply on or off in either direction and you can variably control the speed with the knob... All the footage in the KickStarter video (including the night time shots) were shot that way. Take a look at the sample clip of the milky way by Andy Mcleod and friends in the canary islands! It was shot on lil-mule without move / shoot / move!
But, I can tell you that I bench tested the dynamic perception MX2 controller to the DC geared motor that drives Lil-Mule and all of the shoot move shoot / other more complex functions worked fine. All that's needed is a cable to connect the lil-mule to the MX2 controller.

How did the video in your Kickstarter project turn out so smooth?
There are a couple things to consider here. First, the quality of the wheels is important. The elastomer wheels for Lil-Mule are made in the USA by the only manufacturer that I could find here. Wheels are only part of the equation though.
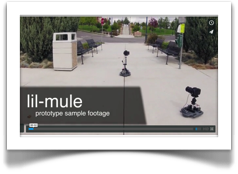
Also, the smoother the surface the better the performance is in general. You can see in the prototype video to the left that I did things like place a thin piece of acrylic in the path of the dolly to minimize the amount of bumping and jolting that would occur when large cracks are encountered on sidewalks.
I have done extensive testing on uneven surfaces like pavement. You can see a shot in the main video at :25 where the dolly is rolling on pavement from the 1960's, and you can actually see the rig swaying as it goes along the uneven pavement. The actual time lapse that resulted and follows right after it was stabilized in Adobe After Effects.
Most video editing software has stabilization features for cleaning up shaky video footage. Turns out that these types of features are perfect for time lapse applications because the image is so big leaving plenty of room for the software to crop / adjust. I've used FCP / Motion stabilization, but now mainly use Adobe AE / Premiere (Time Warp Stabilizer)...